With summer just around the corner, I thought I’d share a fun and easy tutorial with you! It’s always fun to have a project that you can whip up quick. Today, we will be making a quilted sunglass case. Not only does this give you something fun to sew on summer break, but it’s also something that will be useful to keep those summer shades protected! Added bonus: it’s a great way to use up those fabric scraps!!
I don’t know about you, but I’ve had more than one pair of sunglasses end up broken or scratched because I lazily throw them on the middle console of the car, unprotected from accidents (and my kids, ha ha). I don’t spend a lot of my money on my sunglasses, but I certainly get tired of having to replace them because they got scratched up. Or sat on. Or knocked off the console. You get the point.
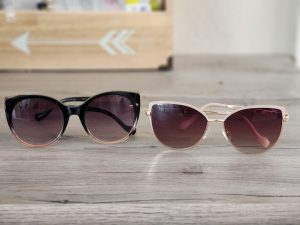
I recently bought two pairs of cute “Jessica Simpson” sunglasses at Ross, and I think I’d like keep these ones around for a while, so I will definitely be keeping them protected in a case!
I held a class sewing quilted sunglass cases last summer, and after that my husband even requested a case for himself to protect his sunglasses. I just so happened to have some hot rod fabric in my stash, so I whipped him up a pair pretty quickly!
In this tutorial, I’m showing you how to quilt it with strips, but you can also do one solid rectangle block if you prefer.
Materials to Sew a Quilted Sunglass Case
Cotton fabric scraps
Batting scraps
A rotary mat and cutter are helpful, but not required
Fabric PenFabric Pencil
Rotary Maat
Rotary cutter
How to Sew a Quilted Sunglass Case
First, cut out two batting pieces that measure 8”x4 ½” each.
You will also need to cut out 2 rectangle pieces for the inside lining that also measure 8”x4 ½”.
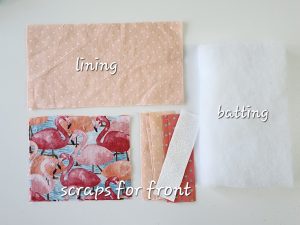
First, you will want to cut the outside pieces of your sunglass case. Like I said, you can either do one solid fabric block (same size as the other rectangles you cut), or you can quilt together strips. I’m going to show you the strips. As you can see in the pictures below, I used one larger rectangle block, followed by other strips that varied slightly in width. The width doesn’t matter on any of this. You can make your strips as wide or as narrow as you like. The thing you want to pay attention to is height. Make sure that the height of your fabric scraps are 4 1/2” tall. Your finished rectangle should be 8” wide once you’re done sewing together all of your scraps.
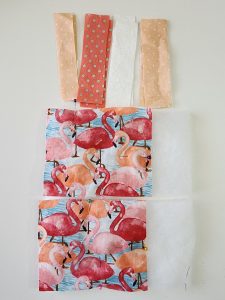
Lay your first rectangle/strip on top of your batting on the left edge, and stitch lines from top to bottom. You can either wing it, or you can draw your lines on with a fabric marker or pencil and stitch on top of the lines.
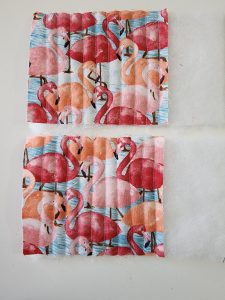
After you are done quilting your first strip, you are going to take your next strip and flip it over so that the right sides are facing each other, and line up the right edge of the new strip to the right edge of your quilted strip. Using a ¼” seam allowance, stitch along the raw edge. Then, turn your strip back over so that the right side is facing up, press and add a top stitch/quilting line on top.
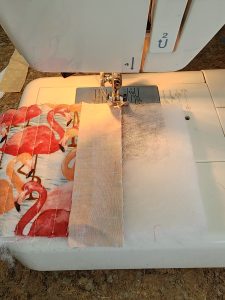
Repeat this until all of the strips are sewn on.
Repeat this entire process for the back side of your sunglass case. So, in the end, you will have two quilted rectangles.
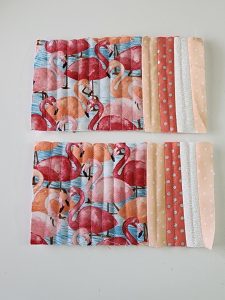
Trim off any scraps/longer pieces to make your rectangle an even block that measures 8”x4 ½”
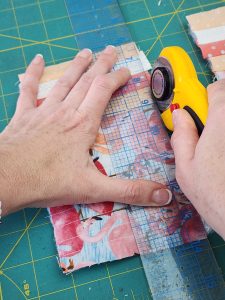
**Alternative sewing method for the quilted pieces: Another way you can do this is by sewing all your strips together first (separate from the batting), and then lay it on top of the batting and sew on your quilting lines. This is how we did it in my sewing class this semester at the learning center, so I didn’t want students to be confused if they come back to make another one and see different directions. Either way will work!**
Now that you are done with your quilted pieces, put them right sides together, and pin along 3 edges: one short end, and the two long edges. Starting at the top of the unpinned, short end, start your stitch around the 3 sides, pivoting when needed. You will be using a 3/8” seam allowance.

Clip your corners when finished.
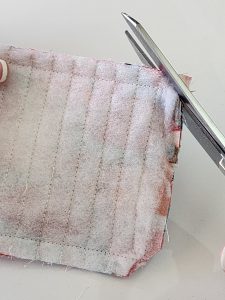
Repeat this step with the lining piece EXCEPT leave an opening on the short end to flip everything at the end. I forgot to take a picture of this step. But basically, start at the top again, pivot at the corner and after a few stitches, backstitch. Then do the same thing on the other long end, pivoting at the corner and backstitching after a few stitches. This will leave an opening for you.
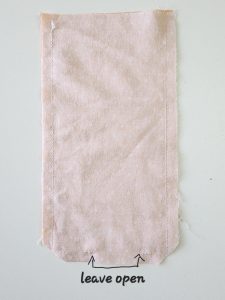
Turn your outer sunglass case piece (the quilted piece) right side out. Use a chopstick if you need to get those corners pushed out. Place this piece inside the lining piece (which is still inside out). Line up your side seams and pin around the top. Stitch around the top.
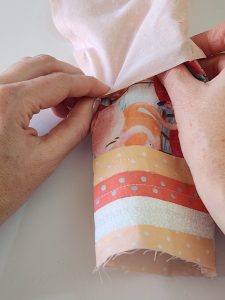
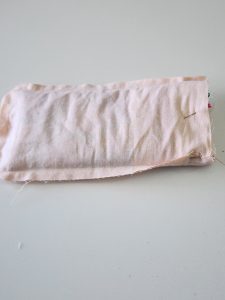
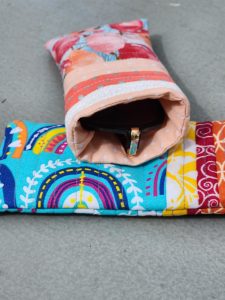
Reach inside that opening at the bottom of your lining, and pull the sunglass case through it. Tuck the seam allowances (of the opening) to the inside and stitch that opening shut. Tuck your lining inside the sunglass case and iron around the top to keep the lining down. You can also add a topstitch around the top if you feel like the lining needs extra help staying put.
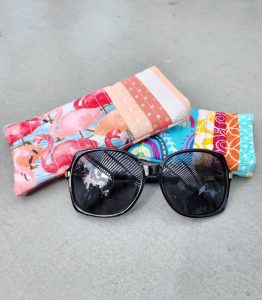
And that’s it! Your sunglass case it complete! Aren’t they cute?
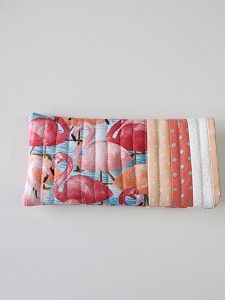
Happy Sewing!
*Sassy Cassy’s is part of the Amazon Affiliate Program, which means that if you purchase Amazon items from this website, a small commission will be earned, at no extra cost to you.
