Are you an avid book reader? I know that e-readers are really popular in today’s modern world, but if you’re like me, there’s nothing that can compare to holding a physical book in your hand. The smell of the pages, the visual of how far you’ve read in the book, marked by a homemade bookmark, of course, peeking at the end to make sure you’re going to have a happy ending (just kidding…I never do that *wink wink*).
Whenever I leave the house to an appointment where I know I’m going to have some waiting to do, I bring along a book to read. Lately, I’ve been doing a lot of waiting as I’ve been getting weekly allergy shots to help with my ridiculous allergies, which means that 1-2 times a week I’m sitting in my allergist’s office for at least half an hour. To be honest, I don’t have time for this in my life, ha ha. But it does give me a good excuse to slow down, take a break, and read a book. It’s also very convenient that my allergist’s office is right down the street from a Joann Fabrics store.
The only problem, as you may have found, is that bringing paperback books along with you can sometimes lead to bent and scuffed corners. In addition to that, I’m always trying to juggle everything I’m taking along: purse, book, keys, cell phone. One of my “regulars” to my Girl’s Nights Out that I host brought a book sleeve to sew one Friday night. I’d never heard of a book sleeve before but when she showed it to me and explained the concept, I loved it! I knew I had to make one!!
I didn’t get the exact details of her dimensions or what/how she did hers, but I figured it would be easy enough to figure out how to make my own. I thought about what I wanted: a pocket for my cellphone was a must. Maybe a zipper for some mints or other snacks I might want to bring without digging through my bottomless purse. I also knew that I wanted to offer this as a project for my kid’s summer sewing camp [insert link], and I always pick projects that will reinforce (or introduce) important sewing skills. Learning to sew zippers is an essential sewing skill, in my opinion! I chose the option of the simplest way to sew in a zipper. For those who are new to sewing, this really is the easiest way to sew in a zipper!! Just look at these cute kids and the awesome job they did sewing their book sleeves!

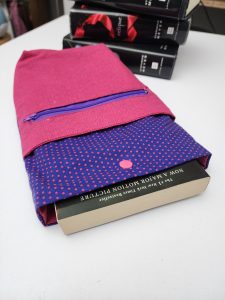
Book sleeves really are a great way to keep those covers and pages protected while you’re out and about. I seriously love mine!! My daughter has also requested that I make one. For those who know my daughter, you know what an avid reader she is (she reads over 100 books a year!!)
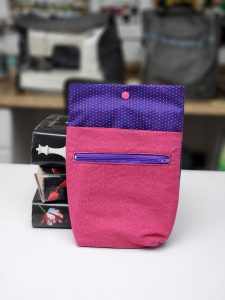
You can make your book sleeves any size you want. Once mine was all sewed up, it measured about 12”x8”, which will hold most sized paperback books. For oversized books, you can easily make yours larger. Adjust your size accordingly! I also added a boxed corner option to give some depth to the book sleeve, so that thick books have room to sit more easily.
Alright, let’s get sewing!
Materials Needed:
- Two outer rectangles, cut at 13”x9”
- Two lining rectangles, cut at 13”x9”
- Two outer pocket pieces, cut at 10”x9”
- One lining pocket, cut at 13”x8”
- Fusible interfacing for inside pocket, cut at 13”x8”
- 6” zipper (If you’re going to make more than one book sleeve, it’s a better deal to buy zippers HERE)
- Plastic snaps
Notes: I matched my outer fabric to my inner pocket fabric, and my lining fabric to my outer pocket fabric. You can do it however you like!
RulerZipper foot
Plastic Snaps with Snap Pliers
Sew on Velcro
Nylon Zippers
Interfacing
CLICK HERE to purchase the pattern and zipper template for $2.50.
Sew the Book Sleeve
**Seam allowance on this project is ½” unless otherwise stated.
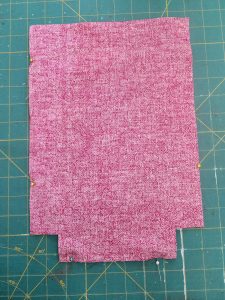
First, cut out all of your book pieces, as listed above. Cut out a 1 ½” square on the bottom corners of your two outer pieces, two lining pieces, and two outer pocket pieces.
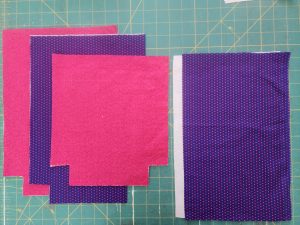
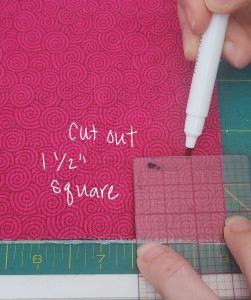
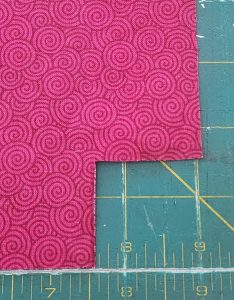
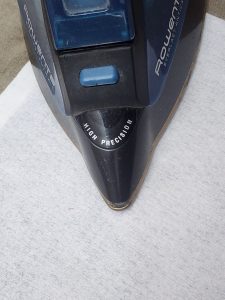
Interface the wrong side of your lining pocket. The lining pocket is the one that measures 13” tall.
Now, we are going to make our markings for our zipper placement. You can follow the directions below, or purchase my printable pattern option (which includes the pocket placement template) for $2.
On the interfacing side of that lining pocket, measure 1” down from the top edge and draw a line from one side of the pocket to the other. I like to use a flat pattern ruler because it has a grid and makes it so much easier to draw patterns! But you do what works for you.
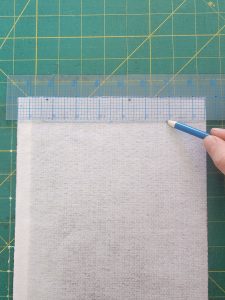
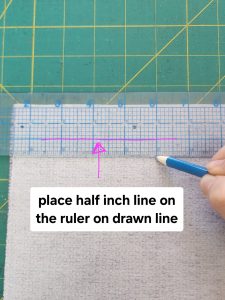
After you’ve drawn that line, draw a second line ½” underneath that line, from one side of the pocket to the other side of the pocket. Then, draw a line in the center of those 2 lines, all the way across.
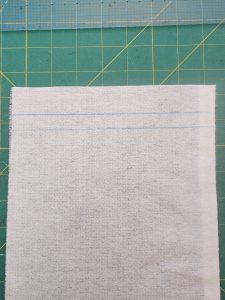
On each side of the pocket, measure 1” in from the sides and draw a vertical line through the three horizontal lines that you just drew.
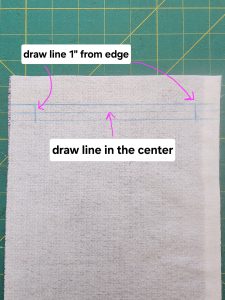
Measure 3/8” in from that 1” line that you just drew (on each side) and mark a dot in the middle line. Connect that dot to each of the corners of the horizontal line you drew in the last step. The picture below will help you to understand how it should look when it’s done.
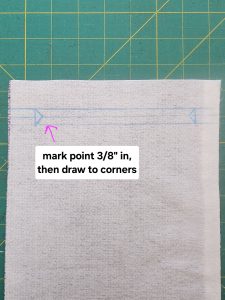
Okay, are we done drawing the lines? I hope that all made sense. The pictures should have helped! That was really the hardest part of the whole project, I promise. Now that you have the opening drawn for your zipper, we are going to sew in the zipper. So first, place that pocket on top of one of the outer pocket pieces, 1” down from the top and right sides facing each other. It should be centered between the two sides. Pin the pocket in place.
Stitch on the top of the outer rectangle lines that you just drew. You can see in the picture below exactly which lines you are following. Be sure to sew exactly on the lines so that the zipper fits properly!
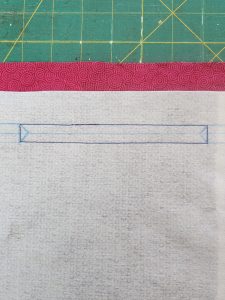
Very carefully, cut the middle line between the stitches, clipping on the lines into the corners.
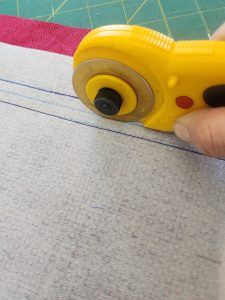
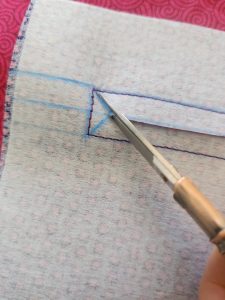
Flip your lining pocket through the opening so that your wrong sides are now facing each other. This is how it should look.
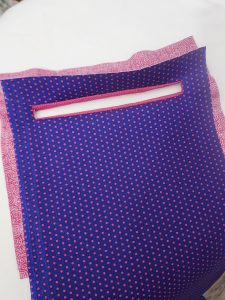
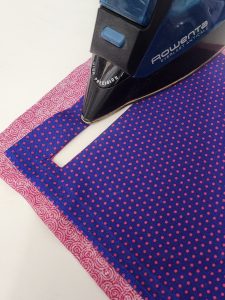
Press your seams down around the opening of your zipper window.
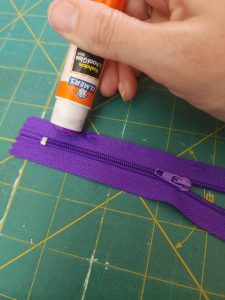
Now we are ready to put in the zipper. I like to use a glue stick to hold the zipper in place. It’s washable and is a great hack to keep the zipper from sliding around while you are pinning it in place. Add a little bit of glue (don’t go overboard!) onto the zipper place, and then center the zipper underneath the zipper window we’ve just created. The smaller, non-interfaced [outer] pocket should be facing up, so you are gluing it to the inner pocket piece.
Pin your zipper in place.
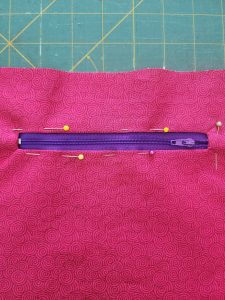
With a zipper foot, stitch the zipper around the entire opening, pivoting at the corners. You will want to keep your stitch approximately 1/8” away from the opening edge to make sure you catch the zipper and don’t get too close to the edge of the zipper tape.
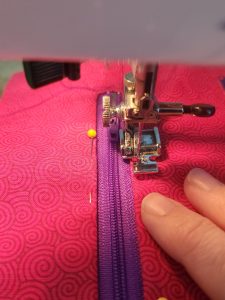
Your zipper is done! It’s all downhill from here!
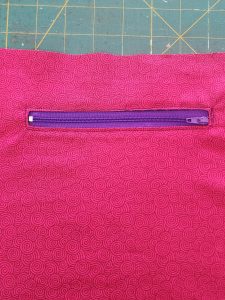
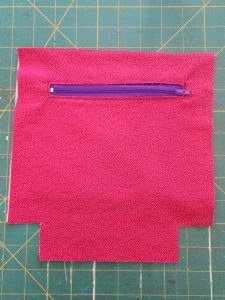
Fold your lining pocket up so that the right sides are together. Pin along the top and the sides, making sure that your edges are even and making sure that you are NOT pinning any part of that pocket to the outer pocket. You don’t need to worry about pinning the bottom because it’s already folded and, therefore, doesn’t need to be sewn (I get asked that question every time!) Stitch around the three sides of that pocket.
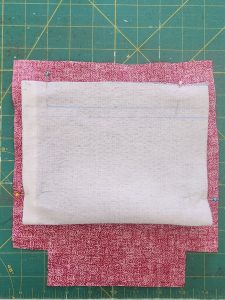
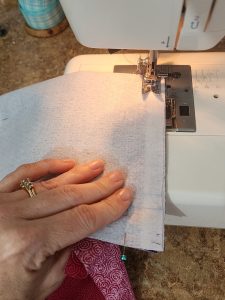
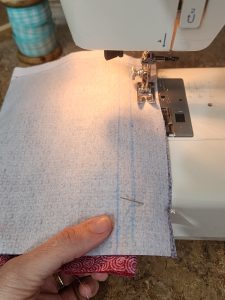
Now, place that zippered pocket you made right sides together with the second outer pocket piece. Pin along the top and then stitch. Flip it so that it’s now right side out and iron the top edge/seam. If the corners are slightly off, feel free to trim them. Even though I cut these at the exact same measurement, somehow they were a tiny bit off after I sewed it together.
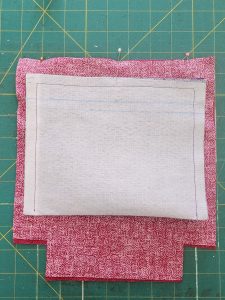
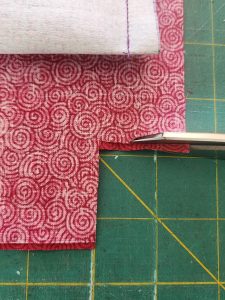
Place your finished pocket piece on top of one of your main outer pieces. Both pieces should be right side facing up. Pin along the sides and the bottom and baste in place.
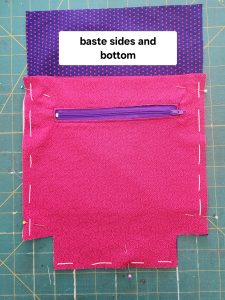
Place your second outer piece on top, right sides facing each other. Pin the sides and the bottom and stitch on your seam allowance.
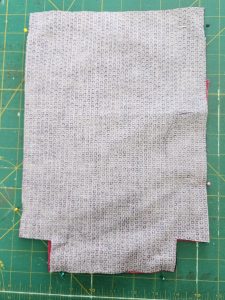
Now, you will stitch your boxed edges. This is always a little tricky to try and explain, but hopefully between my explanation and my picture, you’ll understand.
On the inside of the corner (on that bottom corner that you notched out), pinch both sides of the fabric (front and back) and pull out the corners. This will bring the bottom seam and the side seam to lay on top of each other, as you can see in the picture. Pin your seam, and then stitch across, keeping the edge of your seam on the 1/2″ seam allowance. If this is still too confusing to figure out, don’t fret; I’ve got you! I made a video on how to do this on another tutorial, which you can find HERE. It might be easier to see the steps in action! (Scroll down past the 6th picture to see the video).
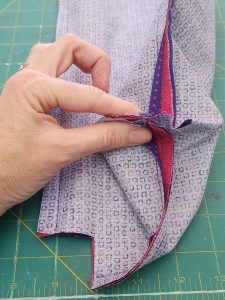
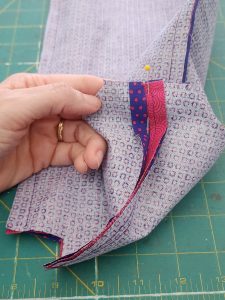
Sew the lining in the same way you sewed your bag pieces together: put right sides together, stitch the sides and the bottom, EXCEPT on the bottom seam, you will leave an opening to flip the bag later. Do make sure to back stitch at the beginning and end of the seams (where you are leaving your opening). Finish by sewing the boxed edges.
Turn your outer bag right side out, but keep your lining inside out. Place your book bag inside the lining. Since your lining is still inside out, that means the lining and the bag will have right sides facing each other. Line up your side seams and the raw edges along the top and pin in place. Stitch around the entire opening on your seam allowance.
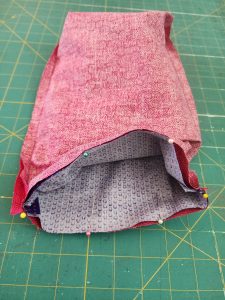
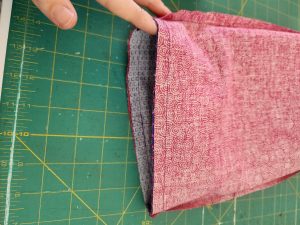
Flip the bag through the opening on the lining. Tuck your seam allowances to the inside of your lining, and stitch the lining closed, next to the edge of the seam. Tuck your lining inside your bag and press around the top opening, making sure that your lining is on the inside.
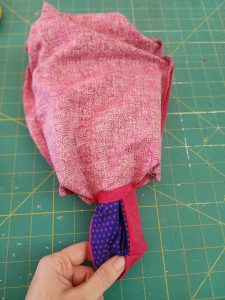
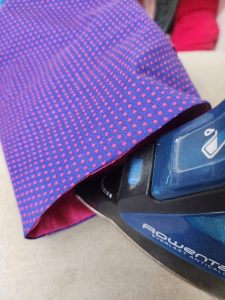
You’re almost done!
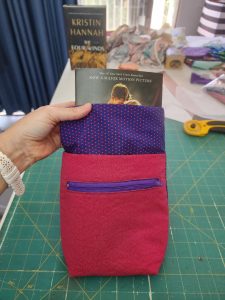
All you have left is the snap at the top. I’m sure you can buy plastic snaps and a snap tool at a craft store. I’m also pretty sure you’ll get a much better deal HERE. For the same price, or a few dollars more, you’ll get way more snaps that you can use on other projects. Find more tutorials HERE.
[Alternatively, if you don’t have/want to do snaps, you can do Velcro.]
To add a snap fastener:
First, find the halfway point between the side seams at the top of your bag. Mark the center with a dot, approximately ½”-1” down from the top of the bag.
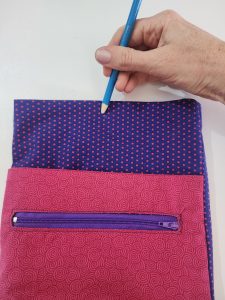
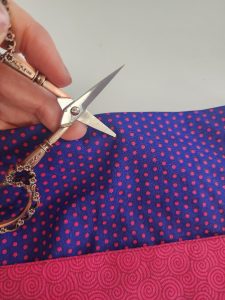
You can follow the instructions that come with your snap kit, but I took pictures anyway to show you how I did it. Very carefully, poke a small hole with your scissors, just big enough to put the snap fastener through. The smooth side goes onto the outside of your bag. On the inside (lining side), you will add the other part of your snap.
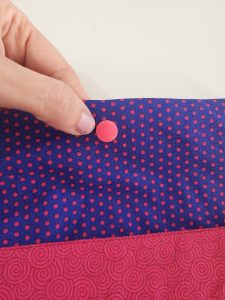
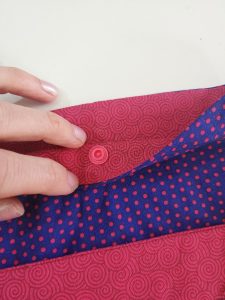
Place it inside your snap tool and squeeze hard.
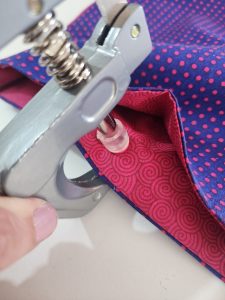
Repeat on the opposite side of the bag, but make sure you use the other snap end that plugs into the first snap you did. I hope that makes sense. Read the instructions on your kit if you need further clarification.
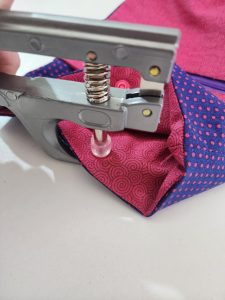
And there you go! Your book sleeve is done and ready to take along with you everywhere you go! I’ve been taking mine everywhere! I’m thinking I may make more for holiday gifts. In all my free time. Ha ha.
*Sassy Cassy’s is part of the Amazon Affiliate Program, which means that if you purchase Amazon items from this website, a small commission will be earned, at no extra cost to you.


